How are Portable Basketball Goals Anchored?
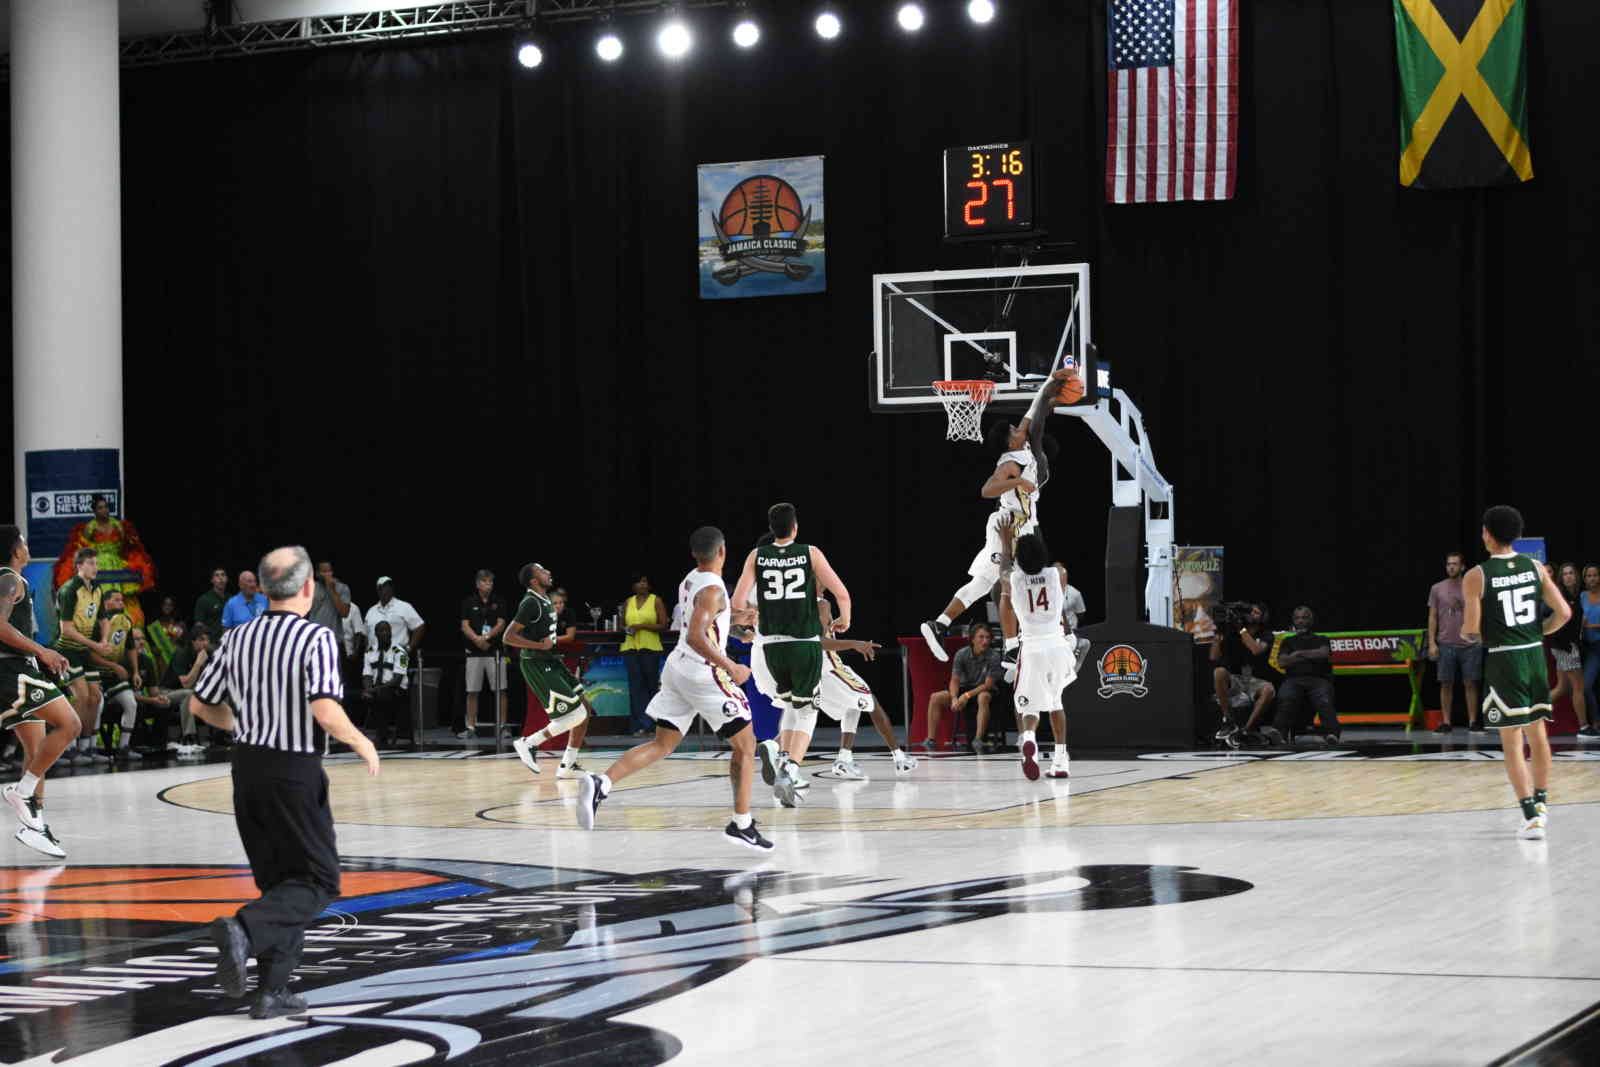
A Legacy 10 portable basketball goal weighs approximately 3,100 pounds. So why does something that substantial still need to be anchored to the floor?
It’s a question we hear more often than you might think.
SNA Sports Group portable basketball goals have plenty of ballast to provide exceptional stability and prevent tipping. But during a powerful dunk, enough force can be transferred to the system to potentially cause the rear of the goal to shift slightly. A rear anchor keeps the goal securely in position.
There’s another important reason: it’s required. NCAA regulations require competition portable basketball goals to have a rear anchor.
All main court competition portables should be properly anchored. For side-court shooting stations, we may also recommend anchoring when the goals will be used for more than shooting or when consistent placement is important.
So, how do you anchor them? Well, it depends on your floor.
Permanent Wood Floors
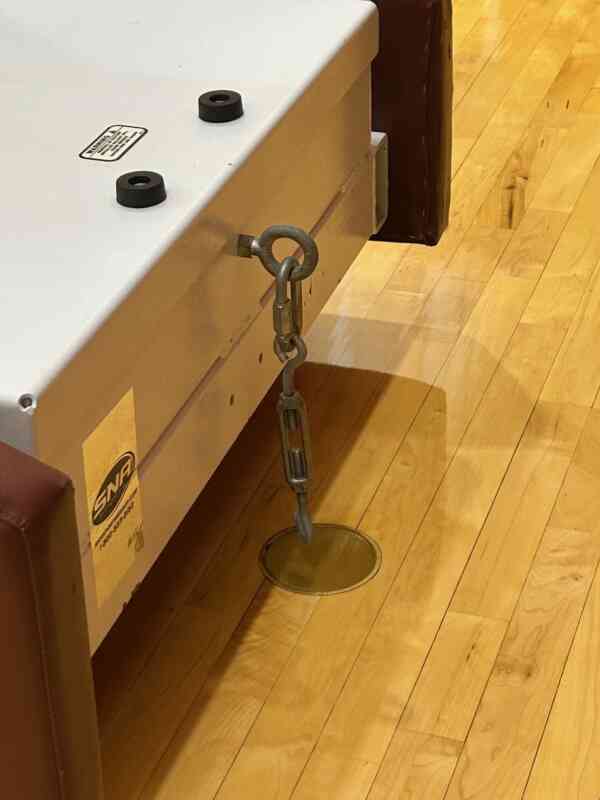
For a permanent wood floor, brass floor guides are installed flush with the playing surface. These guides work with locator pins on the portable goal to ensure the system returns to the correct position every time it’s moved onto the court.
At the rear of the goal, a brass cover plate is installed flush with the floor. Beneath it, an eyebolt and expansion anchor are installed into the concrete. The goal’s rear anchor turnbuckle attaches to the eyebolt to secure the system.
When the portable is moved off the court, the eyebolt remains below the playing surface and the cover plate closes over it, leaving a clean floor.
Portable Wood Floors
Portable wood floors require a different approach.
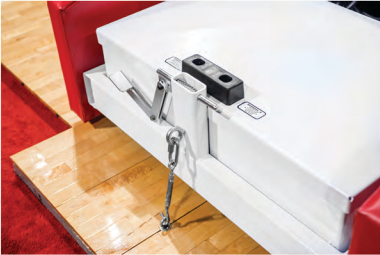
Floor guides are installed flush with the playing surface for proper goal placement. At the rear anchor location, a ⅝-inch hole is drilled through the portable floor panel.
The panel is removed so a steel anchor plate can be mounted underneath, with its threaded opening aligned with the hole in the floor. Once the panel is returned to position, an eyebolt screws through the floor and into the steel plate to provide the rear anchor point.
When the court is taken apart, the floor guides and anchor plates stay with the panels. The eyebolts are removed so the panels can be properly stacked and stored.
Synthetic Floors
With synthetic flooring the anchoring method can vary depending on the thickness of the surface.
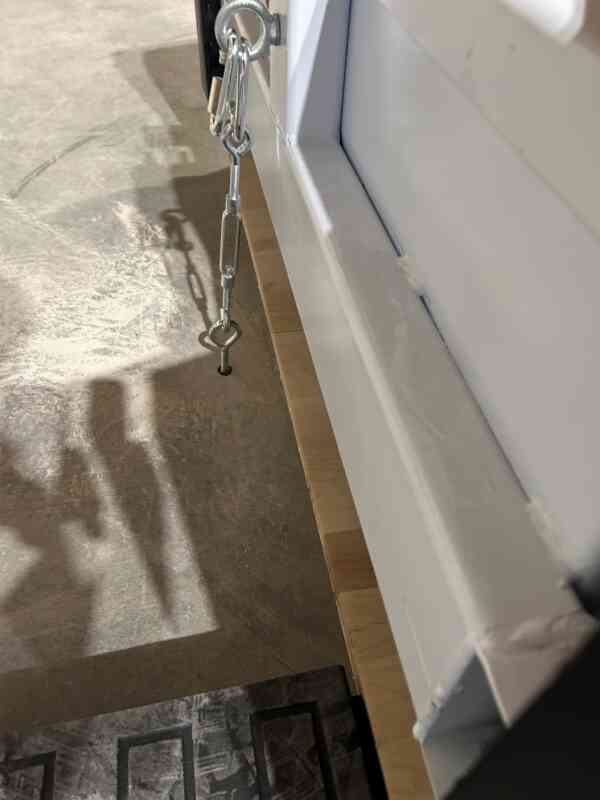
Either brass floor guides or cylindrical brass ferrules are installed to help position the portable correctly. At the rear of the goal, a ⅝-inch hole is made directly into the concrete for the anchor.
A drop-in anchor is secured in the concrete providing the attachment point for a removable eyebolt. The portable’s rear anchor then connects to that eyebolt.
When the goal is moved, the eyebolt can be removed so it doesn’t create a trip hazard.
Already Have Portables? Your Anchors May Still Need Attention.
Anchoring isn’t only something to think about when purchasing a new portable basketball system.
We also hear from facilities after a floor has been replaced or refinished and their existing goals need to be anchored again. In those cases, knowing the new floor type allows us to identify the appropriate anchoring solution.
SNA keeps most anchoring options in stock, which can be especially helpful when a facility discovers late in a project that its anchors need to be reinstalled.
Planning for Installation
Most anchoring needs are identified during the initial sales and installation process. We’ll ask what kind of floor you have — permanent wood, portable wood, synthetic or another surface — and determine the appropriate anchoring equipment from there.
While some facility or building teams choose to install their own anchoring, most installations are handled after direct consultation with SNA.
If SNA is handling your installation, a little preparation can make the process much smoother:
- Make sure the floor is available – Practices, events and other activities need to be scheduled around installation.
- Have the court ready – Floor lines should be painted, and portable floors need to be completely assembled and in place.
- Give newly finished floors time to cure – Polyurethane should be on the floor for at least seven days before portable goals are rolled across it.
- Tell us about the route in – Stairs, ramps, curbs, tight corners and other obstacles need to be identified ahead of time.
- Flag unusual conditions – Electrical wiring, power boxes, multiple layers of flooring or anything unexpected beneath the court could affect installation.
- Let us know if it’s an active construction site – Tell us in advance if installers will need hard hats, steel-toed boots, safety vests or other PPE.
Get it Right From the Start
At 2,800 pounds for the Legacy 8 and 3,100 pounds for the Legacy 10, SNA Sports Group portable basketball goals are engineered with substantial ballast and stability. Proper anchoring adds another layer of security while ensuring competition systems meet applicable requirements.
Whether you’re purchasing a new portable, installing a new floor or trying to determine what anchoring solution works with an existing system, talk with us early.
SNA offers complimentary facility planning assistance, and we keep most anchoring options in stock. Tell us about your floor and your facility, and our team can help determine what you need and coordinate the next steps.
Better planning. Better installation. Better game.